It’s gardening time! You’ve started your seeds inside. They are growing wonderfully. Now it’s time to transplant them into the garden! But Wait! Before you start digging in the dark rich soil, there is still another very important step to make sure your little babies get off to a great start, which is hardening off seedlings.
If you are new to starting seeds indoors, see Start Seedlings Inside Like A Pro.
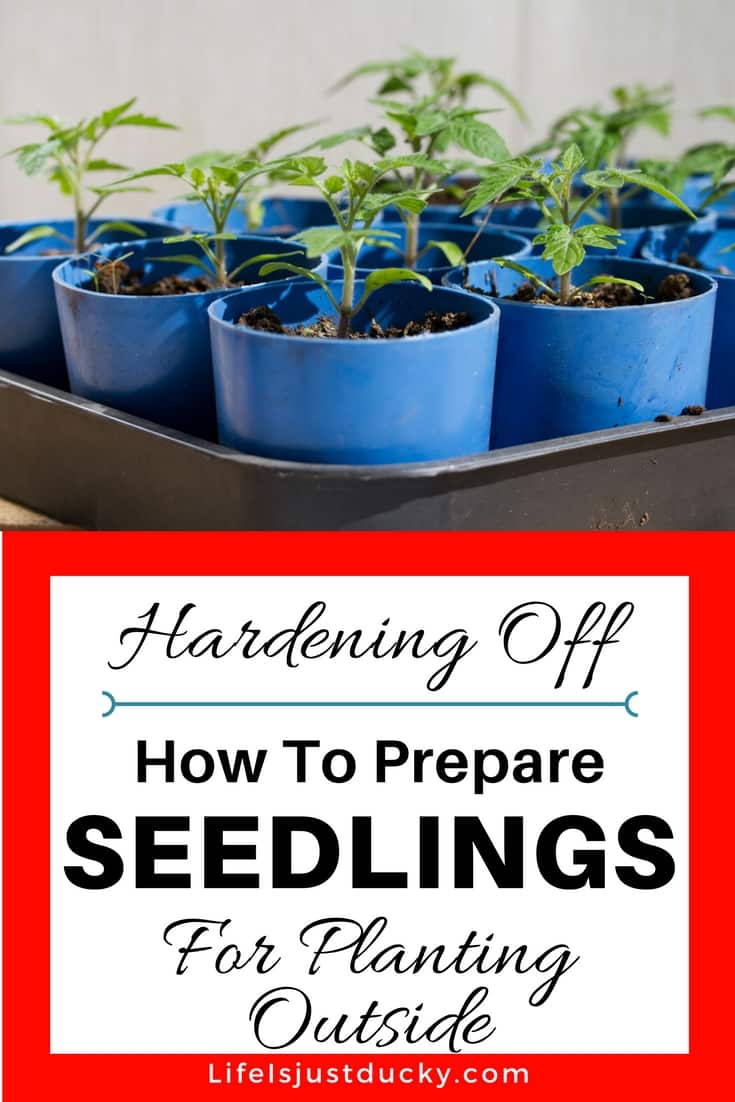
Why You Need To Harden Off Seedlings.
Your seeds have germinated, and you have given them all a young plant needs to grow strong. The days have warmed up and the day to set your babies out into the garden is fast approaching. It is now time to prepare your seedling for life in your garden.
Now that the danger of frost is over you can start hardening off your tender plants. Even after the temperatures rise, conditions outside in the garden are still much harsher than your vegetable seedlings are accustomed to. Young, pampered seedlings that were grown either indoors or in a greenhouse will need a period to adjust and acclimate to outdoor conditions, prior to planting in the garden. This transition period is called hardening off.
Your new little plants are not used to the harsh sunlight or the changes in temperature that happen outside. Since seedlings are still small plants they’re more affected by these changes, especially if they’ve been living the good life inside your climate controlled seed starting area. If you were to take those sensitive plants and move them directly into the garden there’s a good chance that they would not survive the transition.
Hardening off seedlings gradually exposes the tender plants to the wind, the sun, the outside temperature, and rain and toughens them up. This is done by incrementally moving them from the “perfect” conditions in which they sprouted to the relatively unprotected environment of the garden.
This post may contain affiliate links. Please read my disclosure if you have questions.
The How-To Of Hardening Off Seedlings.
Remember, starting with strong fresh seeds is the first step in quality plants.
Before you transplant any of the plants you started indoors, you will have to harden them off. Hardening off plants is basically acclimating plants that you started indoors to the outside weather. You can start to harden off seedlings outside anytime after they have grown their second set of leaves and the threat of frost is past. Begin 7 – 14 days before you plan to transplant them to your garden.
Without the process of hardening off, those tender young vegetable plants would likely become scorched, shocked, stunted, and withered by the unfamiliar elements that weren’t part of their pampered indoor lifestyle. They may even die. But, with a little help from you, they will be able to make the transition to the great outdoors.
What the vegetable plants need is a hardening off period where they can slowly adapt to the more intense light, winds, temperature variations, and other conditions that they will encounter in the outdoor world. Hardening off requires time but the process itself is a simple one.
While hardening off doesn’t take a lot of time, it does involve some vigilance. Here’s what to do:
- Start the hardening off process a couple of weeks before you plan to plant your seedlings out into the garden. Each day you will be moving the plants outside for increasing lengths of time, allowing them to gradually get used to the sunshine, wind, rain, and other outdoor conditions.
- Choose your first hardening off spot. Your seedlings need some protection from wind and sun during their first days outside. You have a couple of options including a shady spot against your home, a table under a tree, or inside a cold frame. When the weather warms in the spring, put the seedlings outside for an hour or two the first day. Start in a shady location where they will be protected from wind and rain. If it is still pretty chilly outside, you may want to prop a lid open over your plants for the first day or two. (it is important to harden off any time of year, but you have to watch for frost in the spring.)
- Place your seedlings outside for an hour. Begin by carefully transporting your seedlings to a somewhat sheltered location where they can get their first taste of what life outdoors is going to be like. This initial exposure should be brief, only an hour or two during the early morning or late evening hours. Make sure that the plants aren’t getting bashed around by the wind. Even if it’s super nice and sunny outside, continue to build up gradually. Believe it or not, seedlings can get sunburned from too much sun without time to adapt! Your grow lights are not as intense as the real thing.
- Move your plants back indoors. At the end of the first day’s hardening off time, put your seedlings back inside. If they were grown in a cold frame, close and secure the opening.
- Lengthen the hardening off time. Every day you can leave them out a little longer, gradually exposing them to the sun. At the same time, you can move seedlings to a less sheltered location—further from the house, out from under a tree, or outside the cold frame. When the weather is warm enough, and the danger of frost has passed, your seedlings can be left outside for good.
- Monitor seedlings. Check them regularly for wilting and water appropriately if they droop. Move them to shade or a sheltered location if seedlings appear stressed.
- Protect your seedlings as needed. If temperatures dip during the hardening off time, you may need to bring seedlings inside or close the cover of the cold frame. You can also use row covers to offer extra security and warmth if there’s a hard rain or cold-weather day.
- Be Vigilant. Keep in mind that the soil will dry out much faster outside, so check on them often. Don’t allow the soil to dry out completely, but it should get a little drier than normal. This is part of the process to harden off seedlings. Your plants need to get used to not always being pampered like they were when they were first starting out. If you do inadvertently forget them and discover a tray of wilted plants, bring them inside and give them a drink and they will most likely recover.
- Be Flexible. Go slowly in the beginning, and if the plants protest by wilting or flopping over, take them back indoors until the following day. Hardening off times depends on the type of plants you are growing and the temperature and temperature fluctuations. The size of the container will also make a difference. So be flexible when hardening off your seedlings and be prepared to whisk them indoors if there is a late freeze or snow.
- Finally, Leave Your Seedlings Out Overnight. Extend nighttime hardening off hours. After several days of getting acclimated to daytime conditions, your seedlings will be ready to adapt to nighttime hours, too. Leave them outside longer and longer—always watching temperatures—until they’ve begun to spend the whole night outside. For most plants, you will want to make sure the forecast is for temperatures to be above 50°F during the night-time hours.
- Don’t Plant Too Quickly. Resist the temptation to put them right into the garden. The air and sun may be saying WARM. But, remember, in the spring, the ground is still warming up and will be too cold for those young little roots.
- Get Ready To Transplant. Once your seedlings handle their outdoor sleepovers without a problem, it’s time to move them into their new home: your garden.

It can be a hassle moving flats and containers of plants in and out every day, but the effort will be rewarded by plants that won’t suffer through a set back in their growth once they are planted out in the garden. A wheeled cart or wheelbarrow will make this job a lot easier. By the end of two weeks of being hardened off, you’ll have healthy vegetable plants that can comfortably spend an entire day and night outside, and are ready to be planted directly into the garden. If necessary you can speed up the process but I’d recommend spending at least a week of hardening off before transplanting those homegrown vegetable seedlings outside in your garden.
Gradual exposure helps your plants toughen up and reduces the possibility of injury. With proper hardening off, they’ll have an easier transition to the garden and begin producing fruit sooner.
Using A Cold Frame.
If you are starting your seedling out before the chance of frost is over and the days are still pretty chilly, you can use a cold frame to help in the hardening off process. Indoor grown plants can be moved and left in a cold frame, for hardening off.
In the same process as before you can set your seedlings out in a cold frame for your hardening off. Start slowly. You may need to make this a slower process than if you had waited longer. Remember to keep them in the cold frame at night until after the chance of frost has passed and the weather has warmed up.
Open the cold frame cover for gradually longer periods of time. Start with 3-4 hours or whatever the air temperature allows and gradually increase the exposure time by 1-2 hours per day. Remember, the noonday sun may be harsher than they are used to so they may need extra protection for a day or two.
Following these tips will ensure that your babies are tough enough to handle real-life conditions when the time comes. That means you’ll have a bit less stress too.
That’s it, the final step before the actual gardening starts. Weeee!
Planting in the Garden
The true joy of starting your own seeds comes when you can finally transplant those flowers, vegetables, and herbs into the garden. Check back next post when we discuss transplanting your new seedlings.
Want to read more? Check out these related posts:
Start Seedlings Inside Like A Pro.
Transplanting Your Garden Seedlings For Success!
6 Tips To Grow The First Ripe Tomato In Your Town!
How To Decide What To Plant In Your Vegetable Garden.
Starting A New Garden – A Well-Planned Garden.
Build Million Dollar Garden Soil.
Until next time… Happy Gardening!

Mary is a gardener, backyard homesteader, and duck wrangler. She is also the owner and writer of LifeIsJustDucky.com and AGoodWordADay.com. (for daily devotions) Mary is passionate about helping others expand their backyard homesteading skills and learn to be more self-sufficient, no matter where they live.