

If you’ve never made sauerkraut at home, you might be surprised by how simple it is.
You don’t need a special fermentation crock, complicated equipment, or a long list of ingredients.
All you really need is fresh cabbage, salt, a jar, and a little patience.
The cabbage releases its own juices when you massage it with salt, creating the brine it will ferment in. A few days later, you’ve got crunchy, tangy, homemade sauerkraut.
And once you understand the basic method, you can start adding your favorite flavors, too.
I especially love dill and garlic together.
This post may contain affiliate links. I will be compensated if you make a purchase after clicking on my links. Please read my disclosure if you have questions.
Thank you for supporting this site with purchases made through links in this post. For Starters Here’s My Amazon Store.

What Is Sauerkraut?
Sauerkraut is cabbage that has been preserved through lacto fermentation.
Shredded cabbage is combined with salt, which draws water from the cabbage and creates a natural brine. Beneficial lactic-acid-producing bacteria then ferment the cabbage, giving sauerkraut its characteristic tangy, sour flavor.
And despite the fancy-sounding name, making sauerkraut is wonderfully old-fashioned.
It’s simply a way of preserving cabbage using salt and fermentation.
If you’re interested in fermenting vegetables beyond cabbage, see my complete guide to lacto fermented vegetables. It covers carrots, kohlrabi, garlic, peppers, cauliflower, and many other vegetables.
Why Make Homemade Sauerkraut?
There are plenty of reasons to make your own sauerkraut.
First, it’s delicious.
Homemade sauerkraut can be crunchy, tangy, and full of flavor. And because you’re making it yourself, you can control the ingredients and add flavors you enjoy. (I think it tastes way better than store bought)
It’s also a great way to preserve a cabbage harvest.
If your garden produces more cabbage than your family can eat fresh, fermentation gives you another way to put that cabbage to good use.
And properly fermented sauerkraut contains live microorganisms, including lactic-acid bacteria that is really good for you.
🥕 From Mary’s Kitchen
I love recipes that don’t require a lot of ingredients or complicated equipment. Sauerkraut is definitely one of those recipes.
Related>> 8 Easy Ways To Preserve Your Harvest
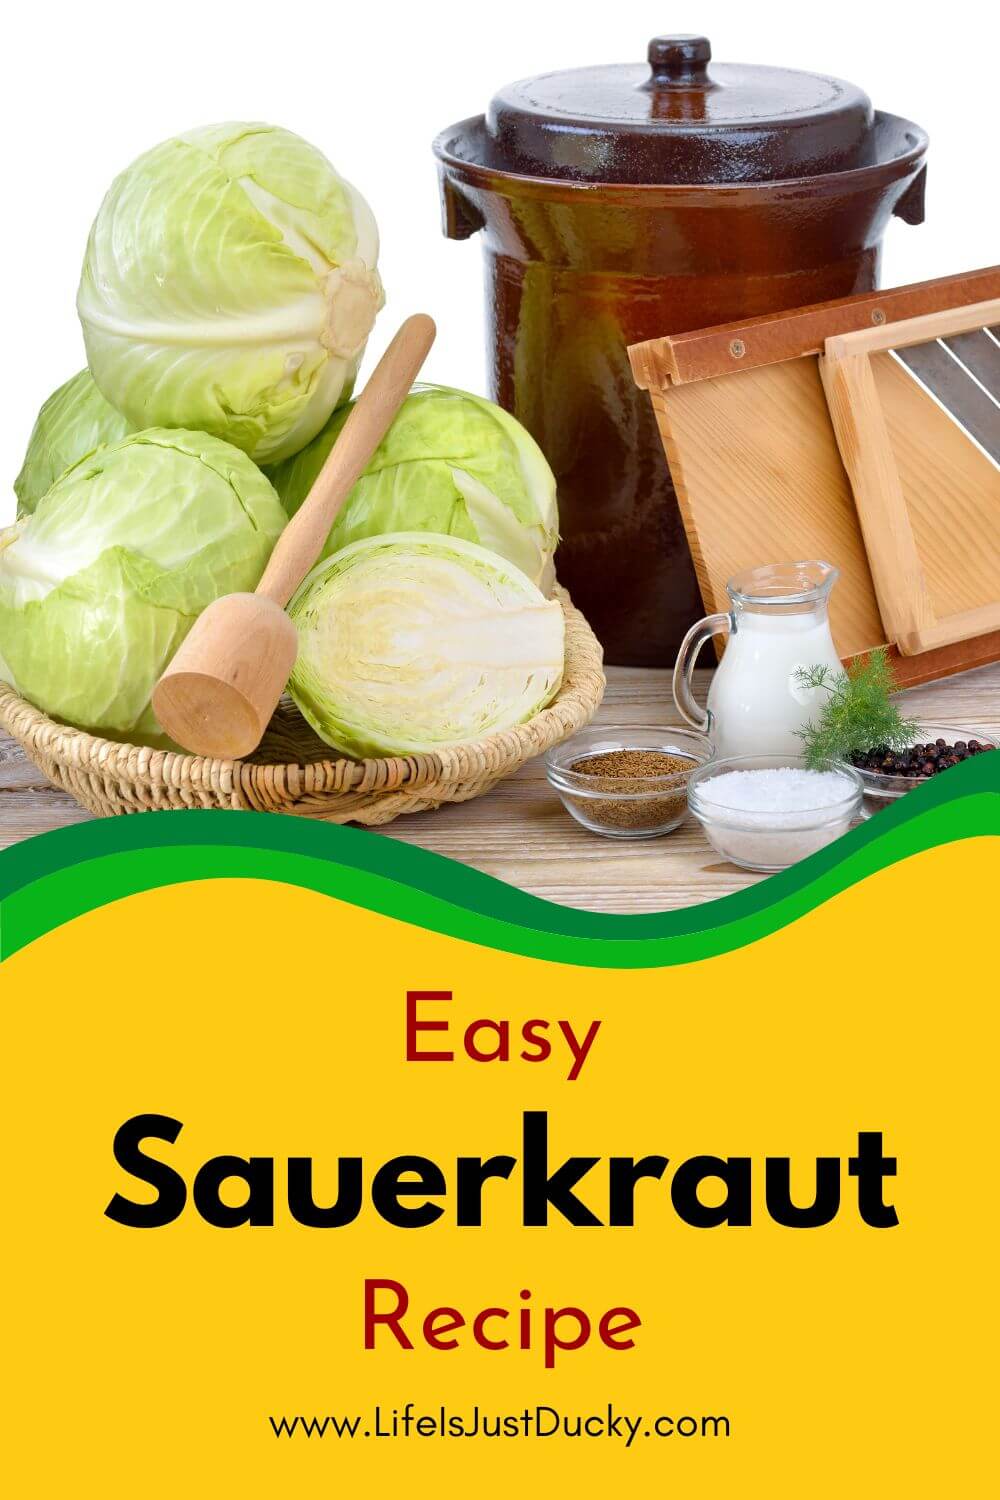
What You Need to Make Sauerkraut
You don’t need a kitchen full of special equipment.
For a basic batch, you’ll need:
- Fresh cabbage
- Salt
- A clean glass jar or fermentation container
- A knife or food processor
- A fermentation weight or another way to keep the cabbage submerged
- A lid or fermentation cover
That’s it.
A fermentation crock can be wonderful if you want to make large batches, but a mason jar is a perfectly practical place to start.
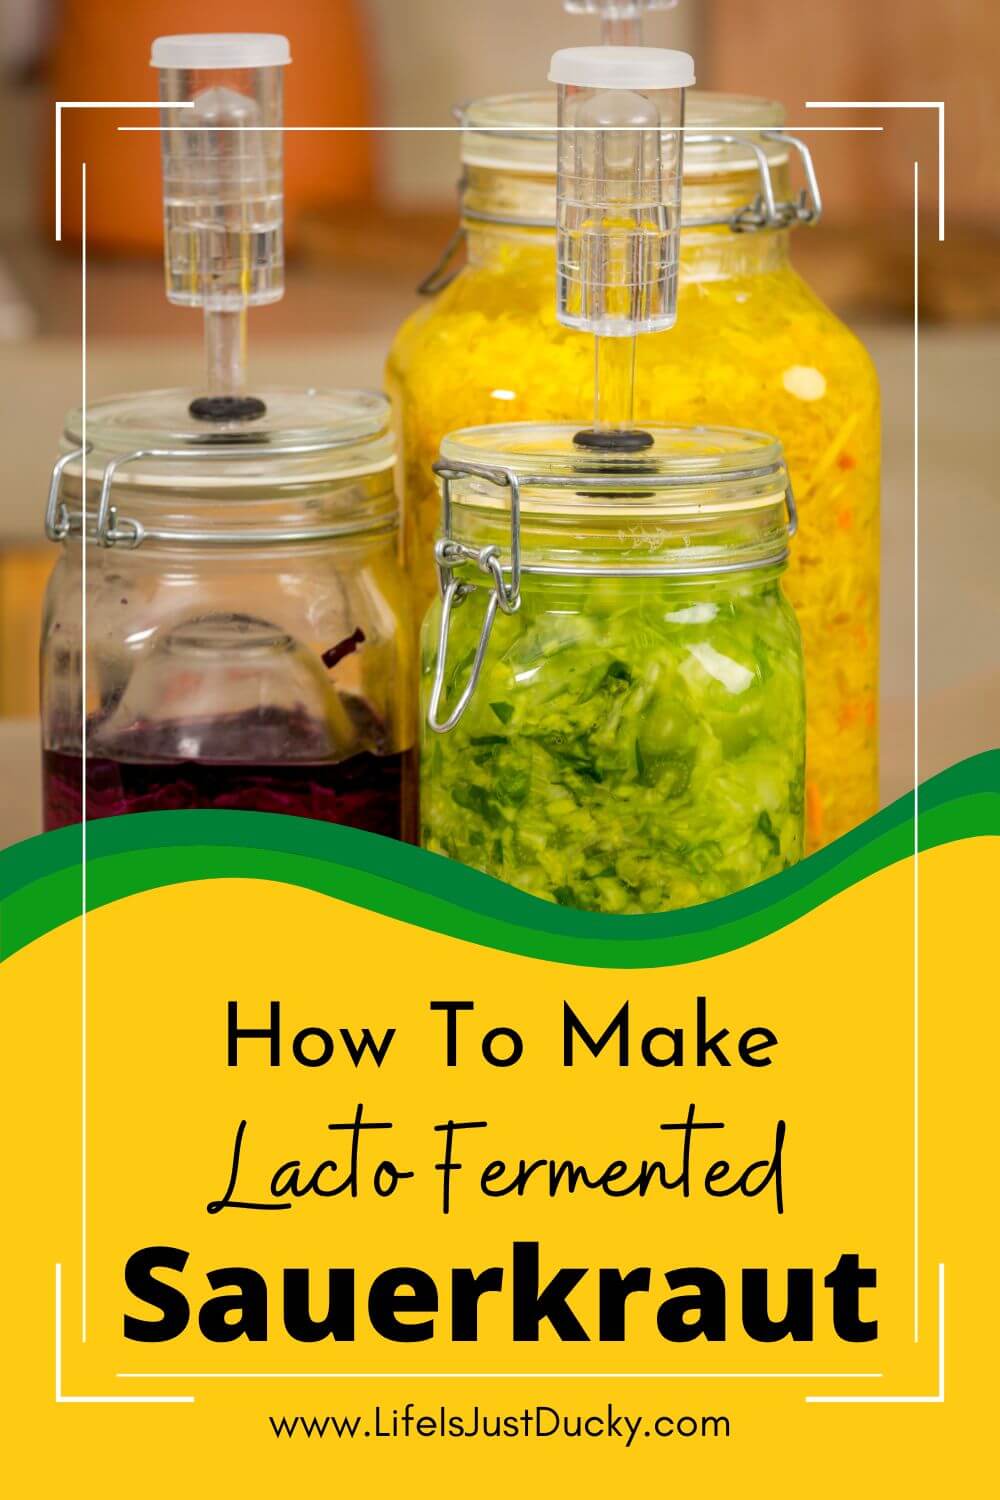
Do You Need Special Equipment for Sauerkraut?
You really don’t need special equipment to make sauerkraut. A clean mason jar, salt, cabbage, something to keep the cabbage submerged, and a cover of some type are enough to get started.
But if you decide you enjoy fermenting vegetables, there are a few fermentation tools that can make the process easier.
Fermentation Weights
The most important thing is keeping your cabbage under the brine. Fermentation weights are small glass or ceramic weights that sit on top of the cabbage and hold it below the liquid.
You can buy weights made specifically for mason jars, and I especially like the ones that fit inside wide-mouth jars. They are reusable and make it much easier to keep everything submerged.
Airlock Lids
An airlock lid allows gases produced during fermentation to escape while helping keep outside air from getting into the jar.
They are not required for sauerkraut, but they can be convenient if you ferment often. Some airlock systems fit directly onto mason jars, so you don’t need a fermentation crock or other large piece of equipment.
Just remember: an airlock doesn’t replace a fermentation weight. You still want the cabbage held underneath the brine.
Springs and Other Fermentation Tools
You may also see fermentation springs, silicone lids, and other small gadgets designed specifically for mason-jar fermentation. These can be handy, but you don’t need to buy every fermentation tool you see.
The basic goal is simple: keep the vegetables submerged, allow fermentation gases to escape, cover to keep dust, spores and fruit flys out.
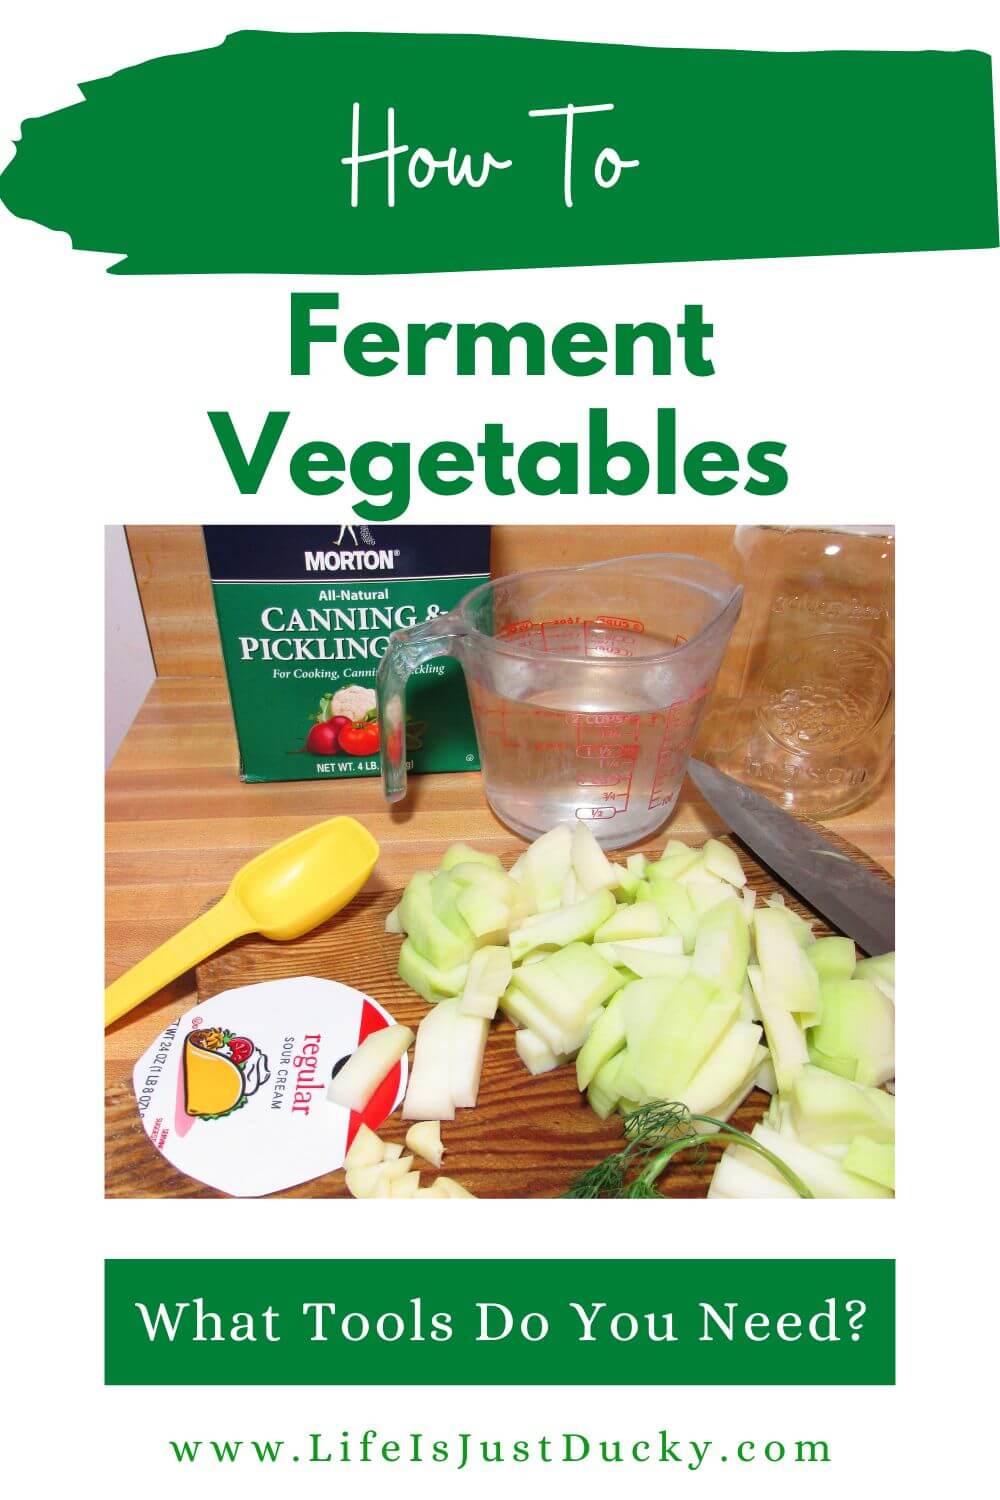
Homemade Ways to Keep Cabbage Under the Brine
And if you don’t have fermentation weights, don’t think you have to run out and buy something before you can make sauerkraut.
There are homemade methods that can work, too.
I’ve used the top of a clean sour cream container (cut to size) as a makeshift weight.(use a regular mouth mason jar so the plastic fits under the shoulder.

My husband thought I’d completely lost my marbles when I asked if he had any “marbles” I could use for fermenting. (put them in a plastic bag and use as weights.)
A small, clean jar or other food-safe object that fits inside your fermentation container can also be used as a weight, as long as it is clean and won’t react with the salty, acidic environment.
Whatever you use, the important part is that the cabbage stays below the brine. That’s the part I would worry about—not whether you have the latest fermentation gadget sitting in your kitchen.
Start with what you have. If you discover that you love making sauerkraut, you can always add fermentation weights, springs, or airlock lids later.
How Much Salt Do You Use for Sauerkraut?
This is one of the most important parts of making sauerkraut successfully.
For my basic sauerkraut method, use:
2 to 2½ teaspoons of salt per pound of shredded cabbage.
Weigh the cabbage after shredding so you know how much salt you need.
I don’t recommend simply guessing at the salt.
Getting the amount right gives you a much more consistent ferment.
Why the Right Amount of Salt Matters
Getting the amount of salt right is important because salt helps create the conditions that allow the beneficial bacteria to thrive while discouraging unwanted microorganisms.
Too little salt can make fermentation less reliable and increase the chance of spoilage, while too much salt can slow down fermentation and make your sauerkraut unpleasantly salty and mushy.
The right amount gives your cabbage the best environment for a successful fermentation while still allowing those good bacteria to do their work.
What Kind of Salt Should You Use?
Use a salt without added ingredients that may interfere with fermentation.
Plain sea salt, pickling salt, or another suitable fermentation salt works well.
The important thing is to measure the salt rather than relying on how salty the cabbage happens to taste before fermentation.
How to Make Sauerkraut
Here’s the basic process.
1. Prepare the Cabbage
Remove any damaged outer leaves.
Save one clean outer cabbage leaf if you’d like to use it later to help cover the shredded cabbage.
Cut the cabbage into quarters and remove the tough core.
Then slice or shred the cabbage into thin pieces.
A food processor can make quick work of a large cabbage, but a sharp knife works just fine.
2. Weigh the Shredded Cabbage
Place the shredded cabbage into a large bowl and weigh it.
For every pound of shredded cabbage, you’ll use:
2 to 2½ teaspoons of salt.
For example, if you have 2 pounds of shredded cabbage, you’ll need approximately 4 to 5 teaspoons of salt.
3. Add the Salt
Sprinkle the appropriate amount of salt over the cabbage.
Now comes the fun part.
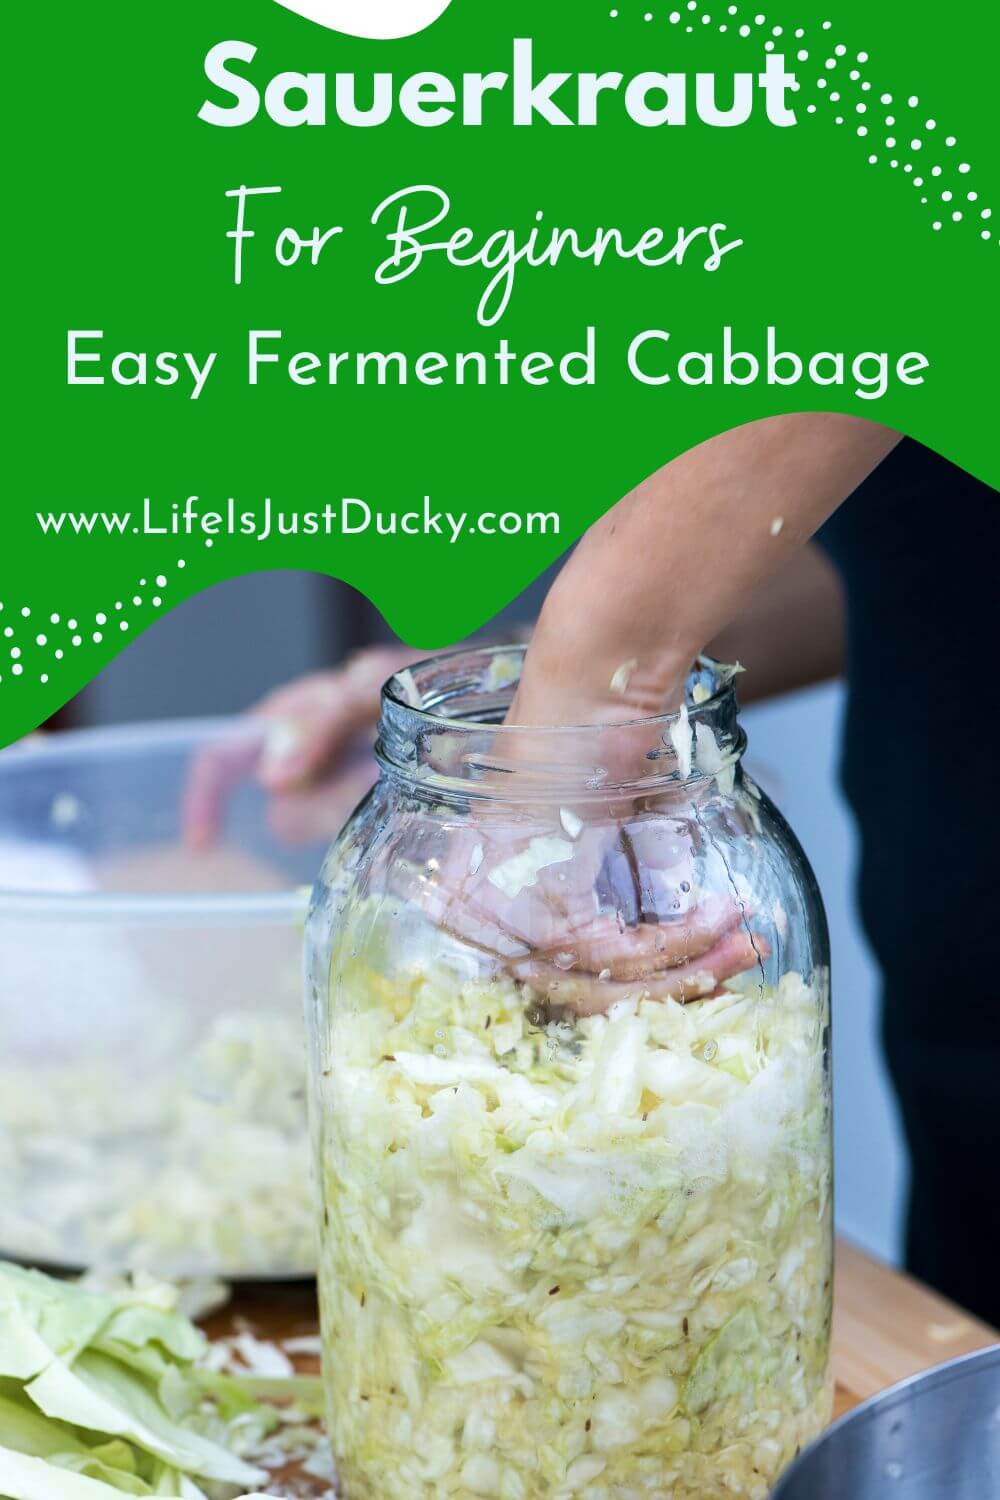
4. Massage the Cabbage
Use clean hands to massage and squeeze the salt into the cabbage.
Work it for several minutes.
At first, the cabbage will feel dry and crunchy.
As you continue working it, it will soften and begin releasing liquid.
That liquid is exactly what you’re looking for.
It’s your natural sauerkraut brine.
🥕 From Mary’s Kitchen
Don’t rush this part. The cabbage really does need to release enough of its own juice to create the brine. It’s a little messy, but that’s part of the fun of making sauerkraut.
5. Pack the Cabbage Into Your Jar
Once the cabbage is soft and juicy, start packing it into your clean jar.
Add the cabbage a little at a time and press it down firmly.
You want to remove as many air pockets as possible.
Continue packing and pressing until all the cabbage is in the jar. Pour in all the liquid too.
Leave some space at the top of the jar because fermentation can become bubbly.
6. Add the Brine
The liquid released by the cabbage should rise above the shredded cabbage.
Press the cabbage down firmly and make sure the liquid covers it.
This is extremely important.
(See below if you don’t have enough brine.)
The cabbage needs to remain submerged beneath the brine during fermentation.
7. Add a Fermentation Weight
Place a clean fermentation weight on top of the cabbage to keep it below the brine.
This is one of those little pieces of equipment that makes fermentation much easier.
If you’re serious about fermenting vegetables, fermentation weights are inexpensive and useful to have.
8. Cover the Jar
Cover the jar with an appropriate lid or fermentation cover.
If you’re using a regular jar lid, don’t tighten it so tightly that pressure can’t escape.
Fermentation creates gases, so your setup needs a way to deal with that pressure. You may need to open the lid twice a day to release the gasses.
(setting it on a small plate will protect your counter from possible bubble overs.)
9. Let It Ferment
Leave the sauerkraut at room temperature while it ferments.
You may notice bubbles, a cloudy brine, and a gradually stronger sour smell.
Those can all be normal signs of fermentation.
The warmer your kitchen is, the faster fermentation may happen.
So don’t feel like you have to wait for a specific number of days before checking it.
Start checking the flavor after a few days.
When it tastes pleasantly sour and has the texture you like, it’s ready to move to cold storage.
What If My Cabbage Doesn’t Make Enough Brine?
Sometimes cabbage simply doesn’t release enough liquid to cover itself.
Before adding anything, make sure you’ve thoroughly massaged the cabbage with the salt.
Give it some time.
Press it firmly into the jar.
If you still don’t have enough liquid, you can make a salt brine to add.
For cabbage, use:
4–5 teaspoons of salt per quart of bottled water. (1 teaspoon per cup of water, if you only need a little)
I recommend using bottled water when making your brine. Chlorinated tap water can interfere with the beneficial bacteria you need for lacto-fermentation, while untreated well water can contain microorganisms or other contaminants that you don’t want in your ferment.
Heat and dissolve the salt completely in the bottled water and let the brine cool to room temperature.
Then add enough brine to cover the cabbage.
Never add hot brine to your sauerkraut.
And don’t add plain water. The added liquid needs to have the appropriate salt concentration.
Keep the Cabbage Submerged
This is probably the most important rule of homemade sauerkraut.
Lacto-fermentation requires an anaerobic (low-oxygen) environment for the beneficial bacteria to do their work. The cabbage needs to stay completely submerged under the brine throughout fermentation. When cabbage is exposed to air, the proper fermentation environment is disrupted, and unwanted microorganisms can grow.
The brine creates the environment needed for fermentation, while the salt helps favor the beneficial bacteria and inhibit the growth of other microorganisms. Keeping the cabbage submerged is an important part of making sauerkraut safely.
Use a fermentation weight or other method to keep the shredded cabbage below the brine.
If you see bits of cabbage floating above the liquid, push them back down or remove them. Don’t leave cabbage sitting above the brine.
How Long Does Sauerkraut Take to Ferment?
There isn’t one perfect fermentation time.
Temperature makes a big difference.
In a warmer kitchen, sauerkraut can ferment more quickly. In a cooler room, it can take longer.
Start checking it after 3 or 4 days.
Taste and texture are important guides.
If you like a milder, crunchier sauerkraut, you may prefer it after a shorter fermentation.
If you want a stronger, more sour flavor, let it continue fermenting longer.
Once it’s where you like it, move it to cold storage.
Fermenting Sauerkraut in a Warm House
You may see sauerkraut recipes that recommend keeping your ferment in a cool room.
That’s certainly fine, but don’t assume you can’t make sauerkraut if your home is warmer.
I’ve successfully fermented vegetables in my own kitchen, and my house isn’t particularly cool.
The warmer your environment, the faster your sauerkraut may ferment.
That simply means you should check it more often.
Once the flavor is right for you, move it to the refrigerator.
Sauerkraut is just one example of lacto fermentation. Learn how to ferment carrots, kohlrabi, garlic, peppers, cauliflower, and more in my guide to lacto fermented vegetables.

How Do You Know When Sauerkraut Is Done?
There are several things to look for.
Your sauerkraut may have:
- A pleasantly sour smell
- A tangy flavor
- Small bubbles
- A cloudy brine
- A softer texture than the original cabbage
- A color that has changed somewhat during fermentation
The most important thing is that it tastes and smells like fermented cabbage—not rotten food.
If you notice a strong rotten or putrid odor, unusual colors, significant sliminess, or obvious mold, discard the batch.
Don’t taste questionable sauerkraut to see whether it’s safe.
Related>> Grow Greens In Your Garden All Year
How to Store Homemade Sauerkraut
Once your sauerkraut has reached the flavor you want, move it into the refrigerator.
Cold storage slows fermentation and helps preserve the flavor and texture.
This is especially important if you live somewhere warm.
Keep the sauerkraut covered and use clean utensils when serving it.
If you have a celler that stays below 55°F (12.7°C) you can store it in there instead of the refrigerator.
Can You Make Sauerkraut Without a Fermentation Crock?
Absolutely.
A mason jar is one of the easiest ways to make a small batch of homemade sauerkraut.
A crock becomes useful when you’re making larger quantities, but you don’t need one to get started.
In fact, I recommend starting with a quart jar or two.
It’s much easier to learn the process when you’re not trying to ferment an entire harvest at once.
Sauerkraut Variations
Once you’ve made basic sauerkraut, you can have fun changing up the flavors.
You don’t have to stop with plain cabbage.
Red Cabbage and Carrot Sauerkraut
This is such a pretty combination.
Red or purple cabbage gives the sauerkraut a gorgeous color, while carrots add sweetness, crunch, and a little contrast.
The finished sauerkraut can have a beautiful pink-purple color as the cabbage juices mingle with the brine.
Red cabbage is also a little firmer than green cabbage, so it can give you a particularly nice crunch.
For this variation, shred your red cabbage and carrots and use the same basic salt-to-vegetable method.
You can also add garlic if you’d like.
It’s a beautiful ferment to make when cabbage and carrots are plentiful in the garden.
Dill and Garlic Sauerkraut
Now we’re getting to one of my favorites.
I love dill and garlic together when I ferment vegetables.
The fresh, herby flavor of dill and the savory flavor of garlic are wonderful with tangy fermented cabbage.
Add fresh dill and garlic to your cabbage before packing it into the jar, then follow the same fermentation process.
This combination would also be delicious with a little carrot mixed in.
Carrot Sauerkraut
Adding shredded carrots to cabbage gives sauerkraut a little natural sweetness and extra color.
It’s an easy variation if you already have carrots on hand.
Garlic Sauerkraut
Love garlic?
Add fresh garlic to your cabbage before packing the sauerkraut into the jar.
The flavor changes as the garlic ferments, becoming less sharp and more mellow.
What Can You Add to Sauerkraut?
Once you understand the basic recipe, there are lots of flavors you can experiment with.
Try adding:
- Fresh dill
- Garlic
- Carrots
- Red cabbage
- Radishes
- Caraway seeds
- Cellery seeds
- Peppers
- Ginger
- Pepper corns
Just remember that the basic fermentation principles don’t change.
Use the appropriate amount of salt for the total weight of the vegetables, pack the vegetables well, and keep everything (including those little seeds) beneath the brine.
Related>> Vegetable Gardening for Beginners: How to Start a Garden Successfully
Common Sauerkraut Problems
My Sauerkraut Is Too Salty
Sauerkraut can taste quite salty when you first mix the cabbage and salt. Don’t worry—that salt is an important part of the fermentation process.
As the cabbage ferments, it develops its characteristic tangy, sour flavor, which balances the saltiness and changes the overall flavor of the sauerkraut.
Always make sure you’re weighing the cabbage and measuring your salt rather than adding it by guesswork.
My Sauerkraut Is Too Soft
Temperature can affect texture.
Warmer fermentation tends to move faster, which can result in softer vegetables.
You can also experiment with a shorter fermentation time if you prefer very crunchy sauerkraut.
My Sauerkraut Isn’t Sour Enough
Give it more time.
The longer fermentation continues, the more pronounced the sour flavor generally becomes.
Temperature also matters. Cooler fermentation can take longer.
My Sauerkraut Is Dry
Cabbage can naturally have differing amounts of water in it.
Make sure you massaged the cabbage thoroughly and packed it firmly into the jar.
If it still doesn’t produce enough liquid to cover the cabbage, add a cooled salt brine using 4–5 teaspoons of salt per quart of water.
My Sauerkraut Has Mold
If you see obvious mold, especially along with an unpleasant or rotten odor, discard the batch.
Don’t scrape off the mold and continue eating the rest.
Keeping the cabbage submerged, using clean equipment, and using the proper salt concentration can help reduce the chance of problems.
And Always, Always use clean utinsels when serving sauerkraut. Don’t cross contaminate your jar with a dirty fork.
🥕 From Mary’s Kitchen
Don’t Be Afraid of FermentationThe first time you see bubbles in a jar of cabbage, you might wonder if you’ve done something wrong.You haven’t.
Fermentation is a living process, and the jar is going to change.
That’s part of the fun.
Once you understand that the salt, cabbage, and natural fermentation are doing the work, homemade sauerkraut becomes much less intimidating.
And then you get to start experimenting with flavors.
For me, dill and garlic are hard to beat.
Homemade Sauerkraut

Ingredients
- 1 pound shredded cabbage
- 2–2½ teaspoons salt
- Distilled water (optional)
Instructions
- Remove damaged outer leaves and core the cabbage.
- Thinly shred the cabbage.
- Weigh the shredded cabbage.
- Add 2–2½ teaspoons salt per pound of cabbage.
- Massage and squeeze the cabbage until it softens and releases plenty of
liquid. - Pack the cabbage firmly into a clean fermentation jar.
- Press the cabbage beneath its natural brine.
- Add a fermentation weight to keep the cabbage submerged.
- Cover appropriately and allow to ferment at room temperature.
- Begin checking the flavor after several days.
- Once the sauerkraut reaches your preferred flavor and texture, move it to the
refrigerator for cold storage.
Important: If the cabbage doesn't release enough liquid to completely cover it,
prepare a cooled brine using 4–5 teaspoons of salt per quart of water and add
enough to cover the cabbage.
Notes
Storage: Refrigerate once fermentation reaches the desired flavor and texture.
Notes: Fermentation time varies with temperature and personal preference.
Warmer conditions generally speed fermentation.
Frequently Asked Questions
Is sauerkraut lacto fermented?
Yes. Traditional sauerkraut is made through lacto fermentation. Salted cabbage ferments in its own juices as lactic-acid-producing bacteria create the characteristic sour flavor.
How much salt do I use to make sauerkraut?
Use 2 to 2½ teaspoons of salt per pound of shredded cabbage. Weigh the cabbage after shredding so you can measure the salt accurately.
Do I add water when making sauerkraut?
Usually, no. Properly salted and massaged cabbage should release enough liquid to create its own brine. If it doesn’t produce enough liquid to cover the cabbage, you can add a cooled salt brine.
What if my cabbage doesn’t release enough juice?
Massage the cabbage thoroughly and give it a little time. If you still don’t have enough brine, add a cooled solution of 4–5 teaspoons salt per quart of water, using enough to cover the cabbage.
Does sauerkraut need to be completely covered with brine?
Yes. Keep the shredded cabbage beneath the brine throughout fermentation. A fermentation weight makes this much easier.
Can I make sauerkraut in a mason jar?
Yes. Mason jars are an easy way to make small batches of homemade sauerkraut.
How long should sauerkraut ferment?
It depends on temperature and your preferred flavor and texture. Start checking after several days. Warmer temperatures generally speed fermentation, while cooler temperatures slow it down.
Can I ferment sauerkraut in a warm house?
Yes. Sauerkraut can ferment at normal room temperature. A warmer environment will generally make fermentation happen faster, so check your sauerkraut more frequently.
Why is my sauerkraut bubbly?
Bubbles can be a normal sign of active fermentation. The microorganisms involved in fermentation produce gases as they work.
Why is my sauerkraut cloudy?
A cloudy brine can occur during fermentation and isn’t necessarily a problem by itself. Look at the overall appearance, smell, and condition of the sauerkraut.
Can I add garlic and dill to sauerkraut?
Absolutely! Dill and garlic are one of my favorite combinations. Add them to the cabbage before packing it into the jar and ferment everything together.
Can I use red cabbage to make sauerkraut?
Yes. Red or purple cabbage makes beautiful sauerkraut and can give you a particularly colorful finished ferment. It also tends to stay quite crunchy.
Does homemade sauerkraut need to be refrigerated?
Once fermentation has reached the flavor you want, refrigerate it. Cold storage slows the fermentation process and helps maintain the finished sauerkraut.
How do I know if sauerkraut has gone bad?
Discard sauerkraut if you see obvious mold, unusual colors, significant sliminess, or smell a strong rotten or putrid odor. Don’t taste questionable sauerkraut to determine whether it is safe.

Ready to Make Your Own Sauerkraut?
If you’ve got a head of cabbage sitting in your refrigerator—or a whole garden full of it—don’t be intimidated by fermentation.
Sauerkraut is really just cabbage, salt, and time.
Start with a small batch.
Measure your salt.
Massage the cabbage until it releases its juices.
Pack it firmly into a clean jar.
Keep it under the brine.
Then let nature take over.
And once you’ve mastered the basic recipe, try adding carrots, red cabbage, garlic, or my favorite combination—dill and garlic.
If you want to explore more vegetables beyond cabbage, be sure to read my complete guide to lacto fermented vegetables.
Keep Learning
If you’ve enjoyed making homemade sauerkraut, here are a few more ways to keep learning about fermenting and preserving your garden harvest:
- Lacto Fermented Vegetables: How to Ferment Vegetables at Home — Learn the basics of lacto-fermentation and discover all the different vegetables you can ferment.
- 8 Easy Ways To Preserve Your Harvest. — Fermentation is just one of many ways to make your garden harvest last longer.
- The Beginner’s Garden Jumpstart — Grow your own cabbage, carrots, herbs, and other vegetables to ferment and preserve.
Happy Backyard Homesteading!

I believe everyone can grow at least part of their own food! Let me show you how.

Mary is a gardener, backyard homesteader, and duck wrangler. She is also the owner and writer of LifeIsJustDucky.com and AGoodWordADay.com. (for daily devotions) Mary is passionate about helping others expand their backyard homesteading skills and learn to be more self-sufficient, no matter where they live.